

Picture this: your kitchen’s looking a bit tired, those old doors chipped and dated, but you dream of that crisp, minimalist vibe that turns heads. Enter DIY Shaker cabinet doors—the secret weapon for a fresh start without the hefty price tag. I’ve been knee-deep in home renos for years, from quick weekend flips to full gut jobs, and these doors are my cheat code for pro-level results. Simple lines, flat panels, and a frame that screams understated elegance. In this deep dive, we’ll cover everything from picking materials to hanging the final piece, all while keeping it under budget. Whether you’re a first-timer with a circular saw or a seasoned maker, you’ll walk away ready to transform your space. Let’s roll up our sleeves and build something that lasts.
Shaker style isn’t just a trend; it’s a philosophy born from 18th-century Quakers who valued function over flash. Think clean edges, no carvings, just honest woodwork that fits any aesthetic—rustic farmhouse, sleek industrial, or coastal calm. What sets DIY Shaker cabinet doors apart? That five-piece construction: two vertical stiles, two horizontal rails, and a floating center panel. It allows for wood expansion without cracks, and the result? Doors that feel custom without the custom cost. I’ve seen folks drop $500+ per door from big-box stores, but with this method, you’re looking at $10-20 each. Plus, the satisfaction of saying, “Yeah, I made that.” It’s the kind of project that hooks you on DIY for good.
Before we jump into cuts and clamps, let’s talk about why now’s the time. Kitchens are the heart of the home, and tired cabinets drag down the whole mood. Updating doors is 80% of the visual impact for 20% of the effort. And with supply chains stabilizing post-2024, wood prices are dipping—perfect for stocking up. Target audience? Homeowners like you, juggling budgets and timelines, craving that “wow” factor. I’ve guided renters through no-drill installs and families through kid-proof finishes. No matter your setup, this guide scales. Ready? Gear up.
Essential Tools and Materials Breakdown
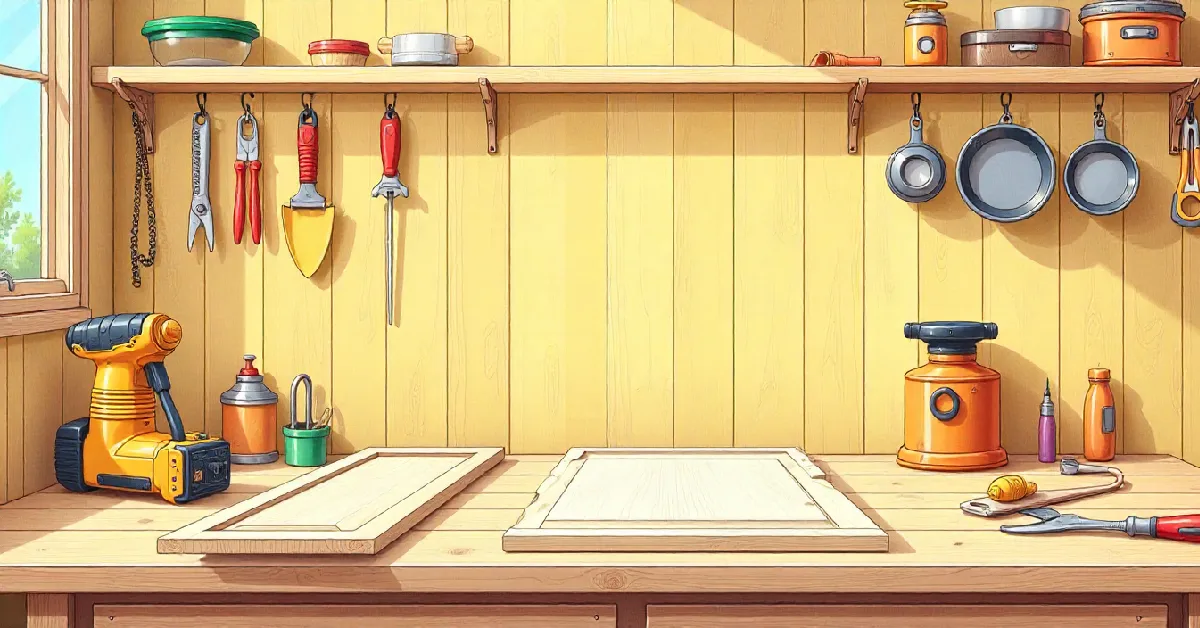
No need for a woodshop empire; start with what fits your garage or apartment corner. I’ve pared this to essentials based on dozens of builds—focusing on versatile pieces that double for other projects. First, tools: a solid circular saw paired with a rip guide is your MVP for straight rips on sheets. Add a miter saw for precise ends, an orbital sander to banish rough spots, and clamps galore for glue-ups. Don’t sleep on a drill with bits for hinges—makes installation a breeze.
Materials-wise, lean into affordability without skimping on quality. 1/4-inch MDF for strips and panels keeps things light yet sturdy; it’s paint-ready and cuts clean. Grab 3/4-inch plywood for backs if you’re going slab-style. Wood glue forms the backbone—opt for Titebond II for weather resistance. Then, fillers, sandpaper grits (120 for rough, 220 for fine), and a primer like KILZ to seal those porous edges. For the finish, a soft hue like Sherwin-Williams Sea Salt brings subtle depth without overwhelming.
Here’s a quick shop list to copy-paste:
| Category | Item | Why It Rocks | Approx. Cost |
|---|---|---|---|
| Cutting | Circular saw + Kreg Rip-Cut Guide | Dead-straight lines on big sheets | $40-60 |
| Precision | HART Miter Saw | Clean crosscuts for rails | $100 |
| Finishing | Orbital Sander | Effortless smooth surfaces | $30 |
| Assembly | Wood Glue & 4+ Clamps | Rock-solid bonds | $20 |
| Panels | 1/4″ MDF Sheets (4×8) | Budget-friendly, easy to paint | $20/sheet |
| Backing | 3/4″ Plywood | Durable core | $25 |
| Prep | KILZ Latex Primer | Blocks stains, grips paint | $15 |
| Color | Sherwin-Williams Sea Salt Paint | Timeless, scrub-resistant | $50/gallon |
Total for 8 doors? Around $250. I’ve scavenged clamps from friends or borrowed saws—pro move for starters. Safety gear: dust mask, goggles, gloves. MDF kicks up fine particles; treat it like flour in a bake-off gone wrong. With this kit, you’re set for success.
One insider tip: Test your local hardware store for offcuts. I’ve scored free plywood scraps that way—saves cash and reduces waste. Now, measurements.
Mastering Measurements: The Foundation of Flawless Doors
Measure wrong, and your doors fight the frame like mismatched puzzle pieces. I’ve learned this the hard way on a bathroom vanity job—gaps everywhere. Start by noting each cabinet opening: width and height, down to the sixteenth. For full-overlay style (common in modern setups), subtract 1/8 inch from total width, split by two for paired doors. Height? Full span minus 1/16 inch for swing clearance. Sketch a rough diagram—label stiles (verticals) as door height, rails (horizontals) as width minus twice the stile width (usually 2 inches).
Account for hinges: standard concealed types need 3 inches from the edges. Taller doors? Add a middle hinge at 1/3 height. Use a laser level if you’ve got one for dead-on marks; otherwise, a trusty tape and square do fine. Pro hack: Mock up with painter’s tape on the cabinet—visualizes fit before cutting.
This step takes 30 minutes but saves hours. I’ve redone entire sets for skipping it. Once locked in, you’re golden.
Cutting and Prepping: Where the Magic Starts
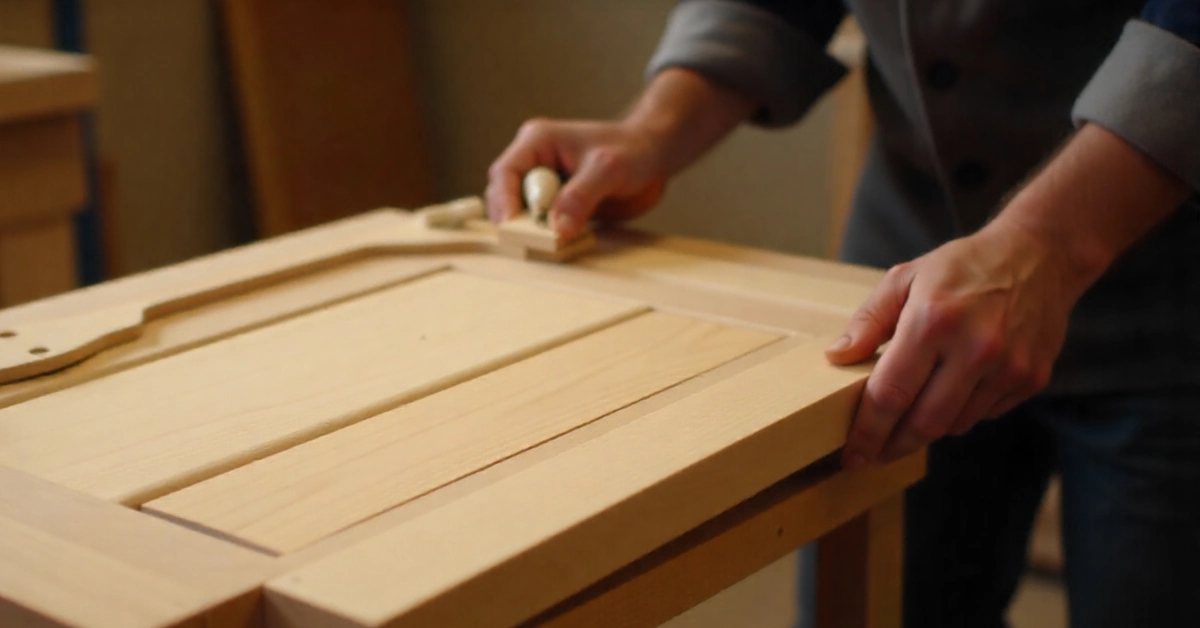
Time to make sawdust. Clamp your MDF sheet to sawhorses, set the rip guide to 2-inch strips for rails and stiles. Run the circular saw steadily—let the tool do the work, no forcing. Cut stiles full length first, then rails to spec. For panels, trace the frame opening, add 1/2 inch all around for groove float, and cut with the same saw.
Edges raw? Hit ’em with 120-grit sandpaper on a block—removes burrs without rounding corners. Dry-assemble: Lay stiles flat, slot rails between, and check squareness with a framing square. Gaps? Trim judiciously. I’ve used painter’s tape to band pieces temporarily—holds for test fits.
If you’re router-savvy, now’s the groove time. A 1/4-inch straight bit at 3/8-inch depth runs along the inner edges. No router? Dado the panel edges slightly for glue grip. Either way, precision here ensures tight joints later.
Visualize it: Strips laid out like a tic-tac-toe board, ready for glue. This phase is therapeutic—rhythm of the saw, scent of fresh cut. Breathe it in.
Assembly Techniques: Glue, Clamp, and Cure
Assemblies where frames come alive. Spread glue thin on rail ends—too much, and it squeezes like toothpaste. Position stiles as bookends, slide panel in (don’t glue it—let it float). Rub joints for molecular bite, then clamp at 90 degrees. Weights like books or sandbags press it flat overnight.
For extra hold without visible screws, pocket holes in rail backs work wonders. Drill two per end, drive 1-inch screws. I’ve tested both; glue-only shines for painted doors, hiding flaws. Check squareness every 15 minutes as it sets—adjust before lock-in.
Cure time’s your cue to plan paint. I’ve multitasked with trim sanding. Come morning, unclamp to reveal sturdy frames. Flex one gently; no creaks means victory.
Common snag: Warped MDF from humidity. Store flat, work in dry spaces. Fixed that on a humid summer build—lesson learned.
Finishing Touches: Sand, Prime, Paint
Sanding’s the great equalizer—turns rough to refined. Start 120-grit orbital passes, focus edges by hand. Fill any glue blobs or seams with wood putty, and sand again at 220. Wipe dust with a tack cloth; residue kills paint adhesion.
Prime coats: Two thin layers of KILZ, 4 hours apart, light sand between. It seals MDF’s thirst, preventing bleed. Then paint—sprayer for speed, brush for control. Sea Salt’s my jam: Greige with green whispers, versatile as jazz standards. Two topcoats, 24-hour dry.
I’ve experimented with milk paint for vintage patina or polycrylic for clear coats. Test swatches on scraps—lighting tricks the eye. Result: Doors gleaming, ready for hardware.
Pro move: Vertical drying racks from PVC pipes—drip-free perfection.
Hardware and Installation: The Final Reveal
Hinges first: Use a jig for consistent cup holes—1-3/8 inch deep, 22mm diameter for Euro styles. Mark 3 inches from the top/bottom, drill pilot holes. Screw hinges to the door backs, then clip to the cabinet.
Pulls: Center 4-6 inches from bottom, drill through. Brass knobs add warmth; matte black for the edge. Hang doors, adjust tension screws for even reveals—1/8 inch gaps all around.
Test cycles: Open-close 20 times. Binds? Shim or plane. I’ve aligned finicky installs with shims under cabinets—stable as a rock.
Step back: Your kitchen’s reborn. That mirror reflection? Pure pride.
Troubleshooting and Pro Tips for Longevity
Hit snags? Uneven gaps mean re-measure; heavy sag from MDF calls for lighter pine swaps. Dust overload? Shop vac with HEPA filter. For renters, 3M Command strips hold lightweight doors—no damage.
Extend life: Annual touch-up paint, soft-close hinges to ease wear. I’ve seen 5-year-old builds looking new—quality glue’s key.
| Issue | Fix | Prevention |
|---|---|---|
| Gappy Fit | Plane edges 1/16 inch | Double-check math |
| Glue Warps | Re-clamp wet | Dry environment |
| Paint Peels | Re-prime edges | Full seal coats |
| Hinge Squeak | Lubricate pins | Quality hardware |
Watch YouTube gems like Geoff’s Joinery for visuals or Peter Millard’s MDF hacks. Erin Zubot’s no-tool method? Gold for apartments.
Conclusion
You’ve got the blueprint: Measure smart, cut true, assemble tight, finish flawless. DIY Shaker cabinet doors aren’t just upgrades—they’re investments in your space and skills. Saved me thousands on flips; it’ll do the same for you. Total time? 2-3 days for 10 doors. Cost? Pennies compared to pros.
What’s your twist—bold colors or wood stain? Drop a comment with your build pics; let’s swap stories. Next project: Countertops? Hit me. Your kitchen’s waiting—go claim it.
