

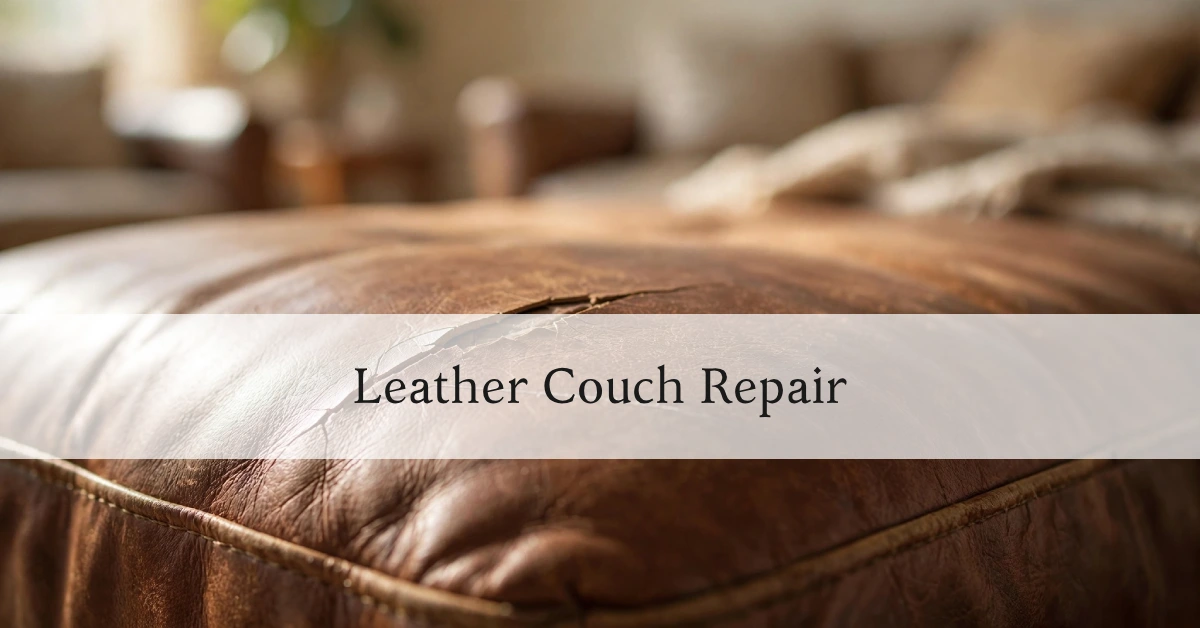
Most leather couch damage — including scratches, cracks, small tears, and fading — can be repaired at home. Clean the area, apply leather filler or adhesive as needed, sand smooth, match the colour with dye, and finish with conditioner. Larger tears or extensive cracking may call for a professional repair.
A leather couch is built to last, but it doesn’t always look like it after a few years of daily use. Scratches from keys or claws, cracks near the seat cushions, a slow peel along the armrest — none of it means the couch is done. Most leather damage can be fixed at home with the right materials, a little patience, and a clear process to follow.
This guide breaks down what causes leather damage, how to tell what kind of repair you’re dealing with, and exactly how to fix it — whether that’s a light scuff you can buff out in ten minutes or a torn seam that needs a backing patch and adhesive. You’ll also find guidance on choosing a repair kit, understanding repair costs, and knowing when it’s smarter to bring in a professional instead of doing it yourself.
Can a Leather Couch Be Repaired?
Yes—Most Leather Damage Is Repairable
Scratches, cracks, small tears, fading, and even some holes can be repaired without replacing the couch. Leather is a flexible material that responds well to fillers, dyes, and adhesives designed specifically for upholstery. The main limits are how deep the damage goes and how large an area is affected.
Repair vs. Replace: Which Option Makes More Sense?
If the couch’s frame and cushions are still in good shape, repair almost always makes more financial sense than replacement. A full leather couch can cost thousands of dollars, while most repairs run from under twenty dollars for a basic kit to a few hundred for professional work. Replacement becomes worth considering when the leather has widespread cracking across multiple panels, or when the frame or springs are also failing.
When DIY Repair Is Enough vs. When to Hire a Professional
DIY repair works well for scratches, small tears, minor cracking, and colour touch-ups. Hire a professional when the damage covers a large surface area, when colour matching is difficult, or when the repair involves structural stitching or full re-dyeing across the piece. A professional will also have access to leather grain textures that are hard to replicate by hand.
Types of Leather Couches and Why They Matter
Knowing your leather type changes how you approach every step of the repair.
Genuine Leather
Made from real animal hide but processed and treated more heavily than full-grain or top-grain leather. It’s durable and repairable, though the surface coating can make colour matching slightly trickier.
Full-Grain Leather
The highest quality leather, using the entire hide with the natural grain intact. It ages well and takes repairs cleanly, but it’s also more visible when a patch or fill doesn’t match perfectly.
Top-Grain Leather
Sanded and refinished for a more uniform look. It’s easier to repair than full-grain because the surface is more consistent, and small imperfections blend in more easily.
Bonded Leather
Made from shredded leather fibres bonded together with adhesive and a polyurethane coating. It’s more prone to peeling and cracking, and repairs tend to be temporary since the material breaks down faster than genuine leather.
Faux Leather (PU Leather)
Not leather at all — a synthetic material made to look like it. Faux leather can crack and peel with less use than genuine leather, and it often requires different repair products than real leather does.
Common Leather Couch Problems
Surface Scratches and Scuffs
Light marks that affect only the top coating, usually from everyday contact, not sharp objects.
Deep Scratches
Cuts that go through the finish and into the leather itself, often visible as pale lines against darker leather.
Cracked Leather
Small fissures that form when the leather dries out and loses flexibility, usually appearing first on high-flex areas like seat edges.
Peeling Leather
Common on bonded and faux leather, where the top coating separates and flakes away from the base material.
Tears and Rips
A break in the leather surface, ranging from a small nick to a several-inch split, often at seams or stress points.
Holes and Punctures
Caused by sharp objects, pet claws, or long-term wear at a single point.
Fading and Discolouration
Usually from sun exposure, cleaning products, or natural ageing, showing up as lighter patches or an uneven tone.
Burn Marks
Small scorch marks from cigarettes, sparks, or heat sources, which discolour and sometimes harden the leather.
Loose Seams
Stitching that has come undone at a joint, often from repeated stress rather than a single event.
Sagging Cushions
Not a leather issue directly, but related wear that affects the foam or support webbing underneath the leather cover.
What Causes Leather Couch Damage?
Daily Wear and Tear
Sitting, shifting, and general contact slowly break down the surface coating over time.
Direct Sunlight
UV exposure dries out leather and fades its colour, which speeds up cracking.
Dry Leather and Lack of Conditioning
Leather needs moisture to stay flexible. Without regular conditioning, it stiffens and cracks.
Pet Scratches
Claws puncture and tear the surface, especially on arms and cushion edges.
Sharp Objects
Keys, zippers, jewellery, and pet nails are common causes of cuts and punctures.
Moisture and Spills
Liquids that sit on leather can stain, warp the finish, or weaken the adhesive holding the top coating in place.
Poor Cleaning Habits
Harsh chemicals, abrasive cloths, or skipping cleaning altogether both damage leather over time in different ways.
Tools and Materials You’ll Need for Leather Couch Repair
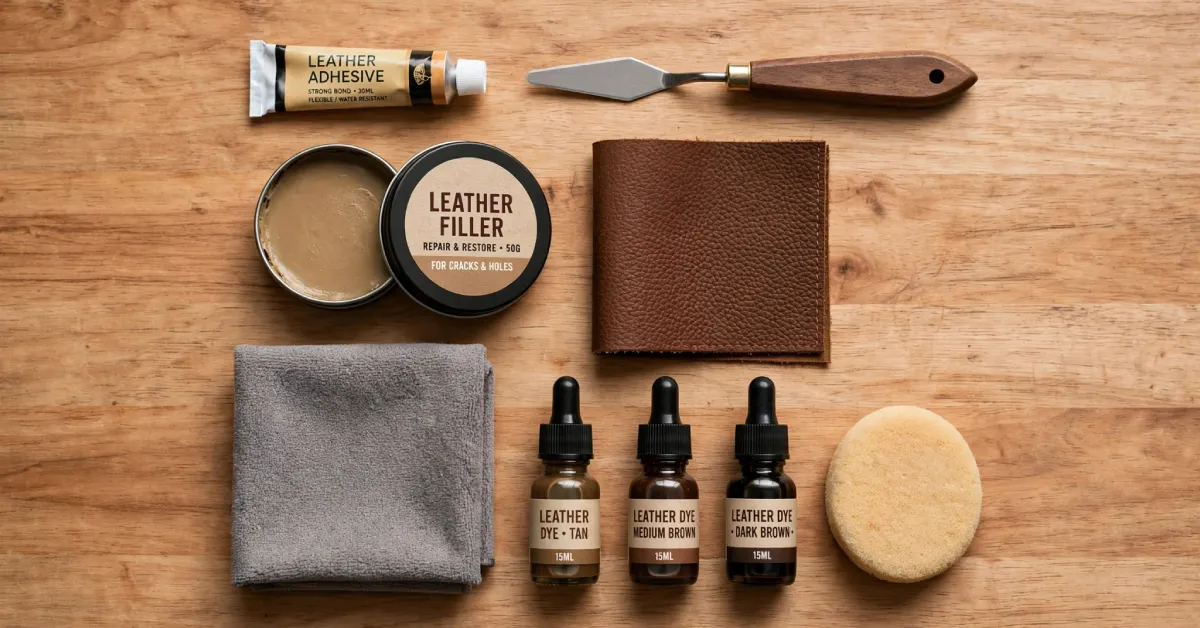
Leather Repair Kit
A set that typically includes filler, colour, adhesive, and application tools in one package.
Leather Cleaner
A pH-balanced cleaner made for leather, not a general household cleaner, which can strip the finish.
Leather Conditioner
Restores moisture and flexibility after cleaning or repair work.
Leather Adhesive
A flexible glue designed to bond leather and backing fabric without becoming stiff once dry.
Leather Filler
A compound used to fill cracks, small holes, and gouges before colour is applied.
Leather Patch
A piece of matching leather or leather-look material placed behind larger tears or holes.
Backing Fabric (Sub-Patch)
A canvas or leather-backed fabric inserted under the damaged area to give the filler and adhesive something to hold onto.
Leather Dye or Colour Restorer
Matches the repaired area to the surrounding leather colour.
Applicator Sponge
Used to spread dye or conditioner evenly.
Palette Knife
Helps apply and smooth filler into cracks and holes.
Scissors
For trimming backing fabric and loose leather fibres.
Microfiber Cloth
For cleaning and buffing without scratching the surface.
How to Repair a Leather Couch (Step-by-Step Guide)
Step 1 – Inspect the Damage
Look closely at the affected area in good lighting. Note the size, depth, and type of damage, since this determines which products and steps you’ll need.
Step 2 – Clean the Leather Surface
Wipe the area with leather cleaner and let it dry fully. Repairs won’t hold well over dirt, oil, or old cleaning residue.
Step 3 – Trim Loose Fibres or Edges
Use scissors to trim any frayed leather or loose threads around tears, so the repair sits flat.
Step 4 – Insert a Backing Patch (If Needed)
For tears and holes, slide a backing patch underneath the damaged area using tweezers or a palette knife, positioning it to cover the full gap.
Step 5 – Apply Leather Adhesive
Spread a thin, even layer of adhesive around the edges of the tear or over the backing patch, pressing the leather down firmly.
Step 6 – Fill Cracks or Gaps
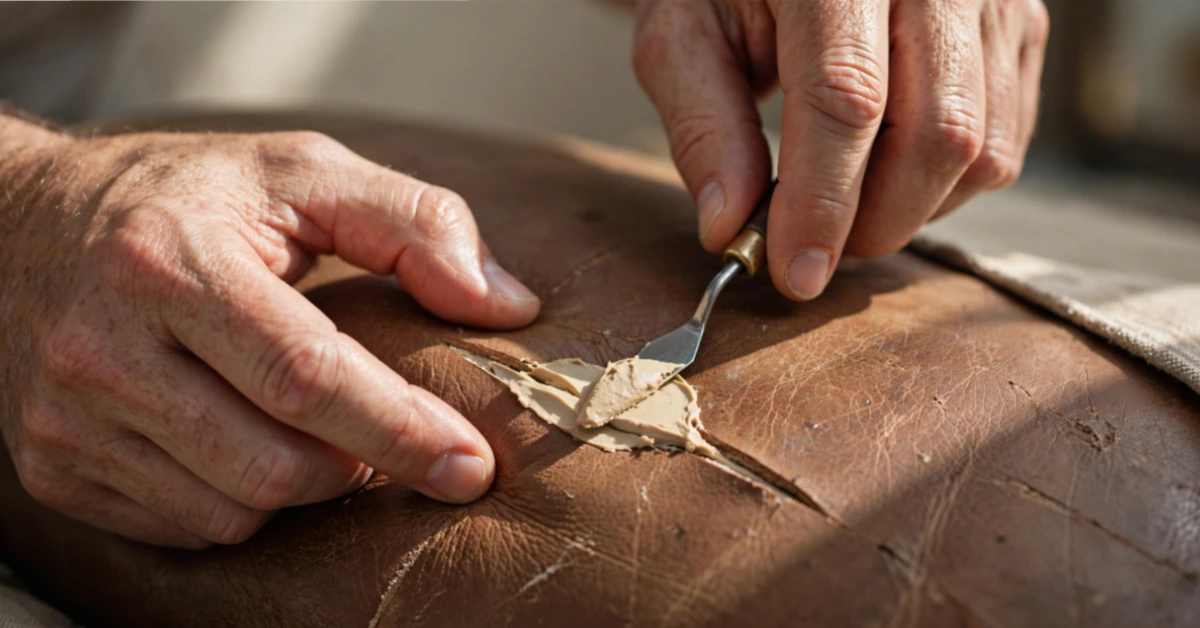
Apply leather filler in thin layers, letting each layer dry before adding the next, until the surface is level with the surrounding leather.
Step 7 – Sand the Surface Smooth (If Required)
Once the filler is fully dry, lightly sand the area with fine-grit sandpaper to remove ridges and create a smooth base for colour.
Step 8 – Apply Matching Leather Dye
Use an applicator sponge to apply dye in thin coats, blending outward into the surrounding leather so the repair doesn’t stand out.
Step 9 – Allow the Repair to Cure
Let the area cure for the time listed on your product, usually 24 hours, without sitting or leaning on it.
Step 10 – Condition and Protect the Leather
Finish with a leather conditioner over the repaired area and the rest of the couch to even out sheen and add flexibility.
How to Repair Different Types of Leather Damage
How to Repair Scratches on a Leather Couch
Light Surface Scratches
Rub the area gently with a microfiber cloth and a small amount of leather conditioner. Many light scratches fade or disappear with this alone.
Deep Scratches
Clean the area, apply a thin layer of leather filler if the scratch has any depth, then colour-match with dye once dry.
How to Repair Cracked Leather
Clean the Surface
Remove dust and oils so the filler bonds properly.
Apply Leather Filler
Work the filler into the cracks with a palette knife, building up in thin layers.
Restore Color
Apply matching dye once the filler is fully dry and sanded smooth.
Condition the Leather
Finish with conditioner to prevent the area from re-cracking.
How to Repair Peeling Leather
Remove Loose Material
Gently peel away any flaking sections that won’t reattach on their own.
Apply Repair Compound
Use a leather repair compound formulated for peeling coatings, spreading it evenly over the exposed area.
Sand and Smooth
Once dry, sand lightly to blend the repaired section with the surrounding texture. Recolour the Surface
Apply matching dye or colour restorer to finish the repair.
How to Repair a Tear in a Leather Couch
Small Tears
Clean the area, apply adhesive along the tear’s edges, and press the leather back together, holding it in place until set.
Large Tears with Backing Patch
Insert a backing patch behind the tear, apply adhesive around the edges, then fill, sand, and dye as needed to blend the repair.
How to Repair Holes in Leather Furniture
Small Holes
Fill directly with leather filler, building up in layers, then sand and dye to match.
Large Holes
Insert a backing patch first, then fill over it, sand smooth, and finish with matching dye.
How to Repair Burn Marks
Trim away any charred material carefully, then treat the area the same way you would a hole or crack — filler, sanding, and colour matching, depending on the depth of the damage.
How to Repair Cat Scratches on Leather
Most cat scratches are shallow and respond well to conditioner and light buffing. Deeper claw marks need filler and dye, following the same steps as a deep scratch repair.
How to Restore Faded Leather
Clean the surface thoroughly, then apply a leather colour restorer or dye across the full panel — not just the faded spot — so the tone stays even.
DIY Leather Couch Repair vs. Professional Repair
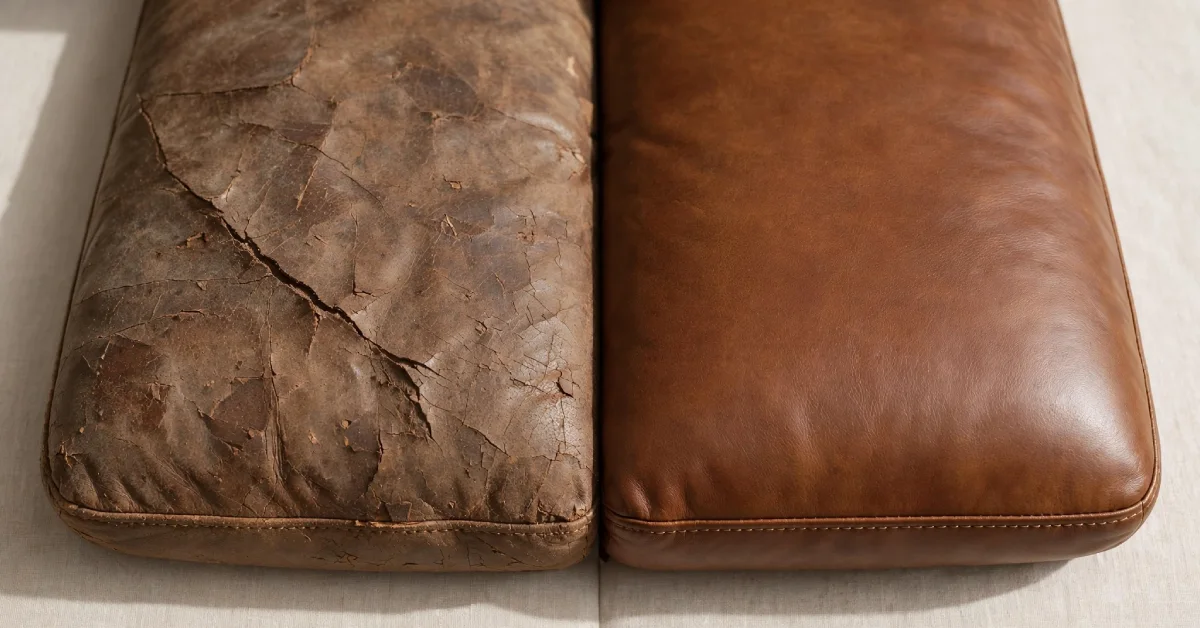
Pros and Cons of DIY Repair
DIY repair costs less and can be done on your own schedule. The trade-off is that learning colour matching and blending takes practice, and mistakes on visible areas can be harder to correct afterwards.
Benefits of Professional Repair
A professional brings experience with colour matching, access to a wider range of leather dyes, and tools for larger structural repairs like re-stitching seams. This matters most on furniture where appearance and long-term durability are a priority.
Which Option Is Right for You?
Choose DIY for small, isolated damage where a slight mismatch in colour wouldn’t bother you. Choose professional repair for large tears, extensive cracking, or leather that’s difficult to colour-match, like two-tone or distressed finishes.
Leather Couch Repair Cost
DIY Repair Costs
Basic repair kits typically range from about $15 to $40. Higher-end kits with a widercolwider colourr added tools can run closer to $50–$80.
Professional Repair Costs
Professional leather repair often starts around $75–$150 for small jobs and can reach several hundred dollars for larger tears, extensive cracking, or full re-dyeing.
Factors That Affect Repair Pricing
Cost depends on the size of the damaged area, the leather type, how closely the colour needs to match, and whether structural work like stitching is involved.
Best Leather Couch Repair Kits
Best Overall Repair Kit
Look for a kit that includes filler, adhesive, backing fabric, and a wide colour-mixing range — this covers most common repair types in one purchase.
Best for Scratches
A compact kit with conditioner and a small colour-touch pen works well for light to moderate scratches without needing filler.
Best for Tears
Choose a kit that includes backing fabric and a strong,g flexible adhesive, since tears need reinforcement, not just surface filler.
Best for Cracks
Look for a filler formulated specifically for flexibility once cured, so the repaired area moves with the leather instead of cracking again.
Best Leather Glue
A contact-style leather adhesive that stays flexible after drying holds up best over time compared to rigid, general-purpose glues.
Best Leather Patch
Pre-cut patches with an adhesive backing save time, but a roll of patch material lets you cut a custom shape for irregular tears.
Best Colour Restorer
A restorer with a wide mixable colour palette gives you the best chance of an accurate match, especially on two-tone or aged leather.
Best Leather Cleaner and Conditioner
A pH-balanced, non-stripping formula is important here — cleaners meant for other surfaces can damage the leather’s finish.
How to Choose the Right Leather Repair Kit
Match the Leather Type
Genuine, bonded, and faux leather each respond differently to fillers and dyes, so check that the kit is suited to your couch’s material.
Match the Damage Type
A kit built for scratches won’t have the backing fabric needed for a tear, and vice versa — match the kit to the specific problem. Colour Matching Tips.
Test the dye on a hidden section of the couch first, like the underside or back panel, before applying it to a visible area.
Essential Features to Look For
Prioritise kits with mixable colour systems, flexible adhesive, and clear instructions specific to upholstery, not just leather goods like bags or shoes.
Mistakes to Avoid During Leather Couch Repair
Skipping the Cleaning Step
Filler and dye won’t bond properly over dirt or oil, which leads to peeling repairs later.
Using Household Glue
Regular glue dries stiff and can crack or discolour leather — always use adhesive made for upholstery.
Ignoring Colour Matching
Applying dye without testing it first often results in a repair that stands out more than the original damage.
Applying Too Much Filler
Overfilling creates a raised, uneven surface that’s hard to sand down without damaging the surrounding leather.
Not Allowing Enough Drying Time
Rushing between steps, especially before sitting on the repaired area, can undo hours of work.
Over-Sanding the Leather
Sanding too aggressively can thin the leather or damage the surrounding finish, so light, even passes work better than heavy pressure.
How to Prevent Leather Couch Damage
Clean Your Couch Regularly
A quick wipe-down every week or two keeps dirt and oils from building up in the leather’s pores.
Condition Leather Every 3–6 Months
Regular conditioning keeps leather flexible and reduces the chance of cracking.
Keep It Away From Direct Sunlight
Position the couch away from windows, or use curtains and blinds to limit UV exposure during peak sunlight hours.
Protect Against Pet Damage
Trim pet nails regularly and consider a throw blanket over areas pets frequent most.
Clean Spills Immediately
Blot — don’t rub — spills right away to prevent staining and softening of the leather’s finish.
Avoid Sharp Objects
Keep keys, tools, and jewellery away from direct contact with the couch surface.
Use Protective Covers in High-Traffic Areas
A cover or throw on frequently used cushions reduces daily wear on the leather underneath.
Final Thoughts
Most leather couch damage — scratches, cracks, tears, and peeling — can be repaired at home with the right tools and a careful process. Cleaning, filling, colour matching, and conditioning are the core steps behind nearly every repair.
If the frame and cushions are still solid, repair is almost always the more practical choice over replacement, both in cost and effort.
Regular cleaning, conditioning every few months, and keeping the couch out of direct sunlight will do more to protect it long-term than any single repair.
Frequently Asked Questions
Can a leather couch be fully repaired?
Most damage — scratches, cracks, small tears, and fading — can be repaired to look close to original condition. Extremely worn or widely cracked leather may show some visible signs even after repair.
What is the best leather couch repair kit?
The best kit depends on your damage type and leather colour. A kit with mixable dye, flexible filler, and backing fabric covers the widest range of repairs.
How much does leather couch repair cost?
DIY kits typically run $15–$80, while professional repairs range from about $75 for small jobs to several hundred dollars for larger or more complex damage.
Can cracked leather be restored?
Yes. Filling the cracks, sanding smooth, and applying matching dye restores both the look and flexibility of cracked leather in most cases.
Can peeling leather be repaired?
Yes, though repairs on bonded or faux leather tend to be less permanent than on genuine leather, since the base material breaks down over time.
Can I repair a leather couch without a patch?
Small tears and holes can sometimes be filled directly, but larger damage usually needs a backing patch for the repair to hold under regular use.
How long does leather couch repair last?
A well-done repair with quality products can last several years, especially with regular conditioning and care.
Is leather glue permanent?
Leather adhesive forms a strong, long-lasting bond, though it’s not indestructible — repeated stress on the same spot can eventually weaken it.
Can bonded leather be repaired?
Yes, but repairs on bonded leather are often shorter-lived since the coating naturally peels and breaks down faster than genuine leather.
How often should leather furniture be conditioned?
Every three to six months is a good general guide, though couches in direct sunlight or heavy use may need conditioning more often.