

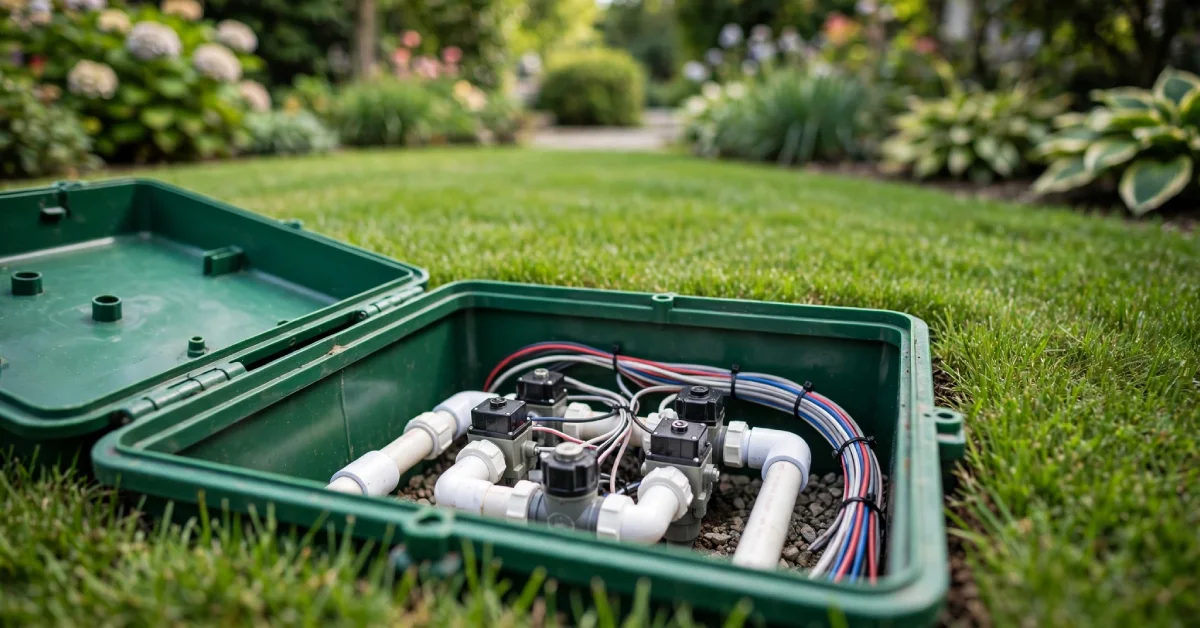
Every automatic sprinkler system runs on a set of valves that turn water on and off for each zone. Left exposed, those valves and their wiring would sit in direct contact with soil, roots, and whatever runs over the lawn, from mowers to foot traffic. An irrigation valve box solves that problem. It is a rigid case, usually plastic, that sits over the valve assembly with a lid you can lift to reach the parts inside.
The box does two jobs at once. It keeps dirt, insects, and moisture away from the valve body and solenoid wiring, and it gives you a clear, marked spot to find the valve when something needs fixing. Without one, a broken valve can mean digging up several feet of lawn just to locate it.
Why Your Sprinkler System Needs One
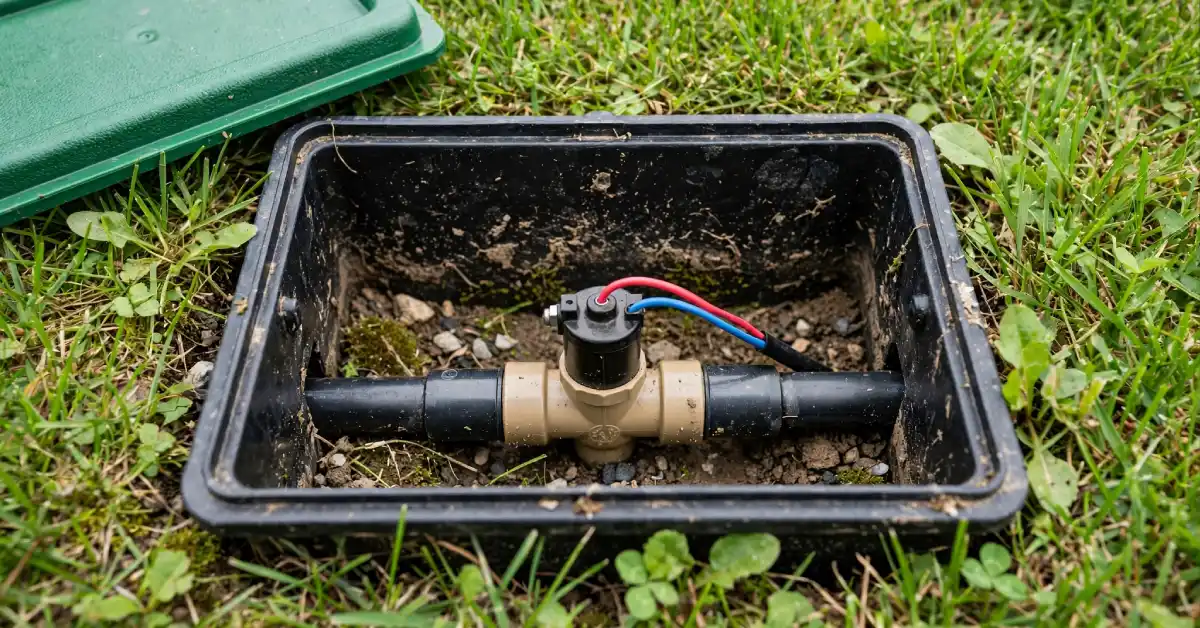
Skipping a valve box is not just a cosmetic shortcut. Buried valves exposed to raw soil corrode faster, and wire splices left unprotected are far more likely to fail from moisture intrusion. That kind of failure is a leading cause of “phantom” zone problems, where a station stops responding and the wiring, not the valve, turns out to be the culprit.
Water use is part of the case too. The U.S. Environmental Protection Agency estimates that roughly 28.8 million in-ground irrigation systems are currently installed across the country, and it estimates that at least 90 per cent of those systems could use more efficient nozzles to cut water use. A well-maintained system, starting with valves that are protected and easy to service, is a big part of keeping that efficiency in place. A valve you cannot find or reach quickly tends to get left running longer than it should, and that adds up on the water bill.
A few practical reasons to install one properly:
- Protects wiring splices from soil moisture, a common cause of zone failures
- Marks the valve location so future repairs do not require guesswork
- Keeps mowers, edgers, and foot traffic from damaging exposed fittings
- Simplifies winterising, since you can reach shut-off and drain points fast
- Supports resale value by keeping the irrigation system serviceable and tidy
Round, Rectangular, and Jumbo Valve Boxes Compared
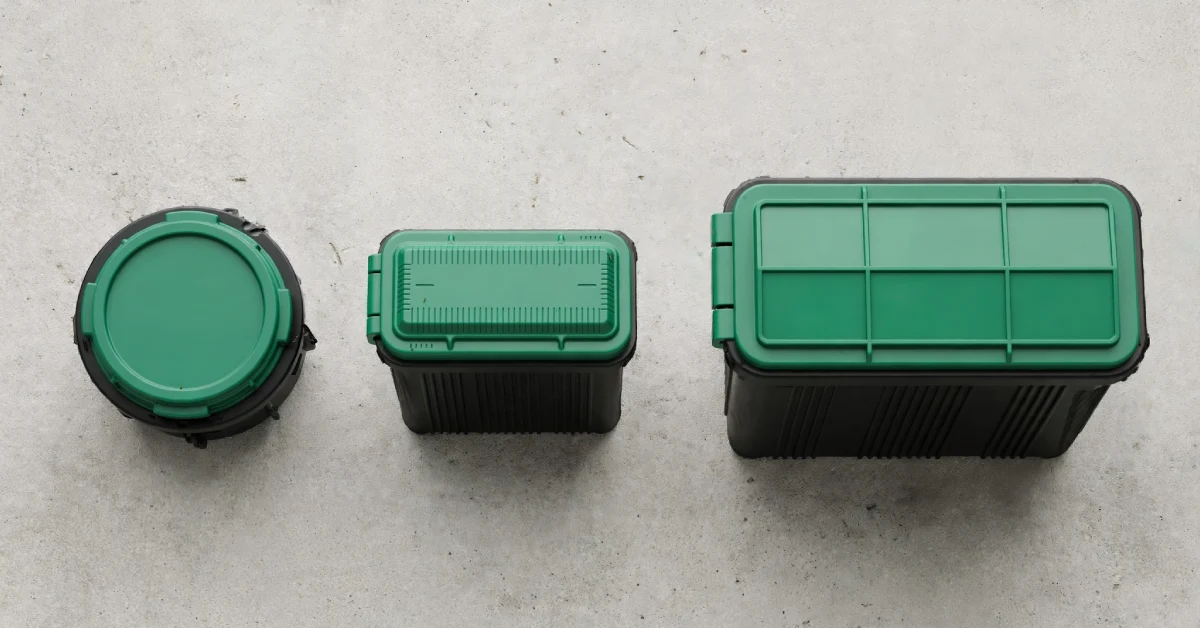
Valve boxes are not one size fits all. The shape and size you need depends on how many valves sit in one location and how much room the wiring and fittings take up.
Round boxes, typically 6 to 10 inches across, suit a single valve on its own line. They are the cheapest option and the easiest to fit into a tight planting bed. Rectangular boxes, often 12 by 17 inches or larger, hold two or three valves side by side and give you more room to work when you open the lid. Jumbo and maxi boxes go further, covering manifolds with four or more valves, backflow devices, or a controller connection point.
Colour matters too. Standard boxes use a black body with a green lid. Purple lids and bodies signal a reclaimed or non-potable water line, a colour code used across the irrigation industry so anyone working near the system knows not to drink from or connect to that water source.
Picking the Right Size for Your Setup
Start by counting how many valves need to sit under one lid. A single zone valve fits comfortably in a round box. Two or three valves on a shared manifold call for a rectangular box with enough clearance around each valve body to turn a wrench without hitting the sides.
Depth matters as much as width. Measure from the top of the valve to the pipe below it, then add a few inches of clearance so the lid sits level with, or just above, the finished grade. If your valves sit deeper than a standard box allows, look for an extension collar rather than forcing a box that is too shallow. It stacks on top of the base box and adds height without needing a new footprint.
If you are watering separate garden zones, such as flower beds that also get hand watering between irrigation cycles, it helps to plan valve box placement alongside how you care for those beds day to day. For instance, once you have cut flowers from the garden, our guide on how to keep cut flowers fresh covers the simple steps that keep them lasting longer indoors.
Which Material Holds Up Best Outdoors
Most residential valve boxes are moulded from high-density polyethene, known as HDPE, or a polypropylene and HDPE blend. Both resist cracking under freeze and thaw cycles and hold up under UV exposure without going brittle within a season or two. Cheaper boxes made from thin, unrated plastic tend to warp or split within a year or two of sun exposure, especially in hotter climates.
Fibreglass boxes cost more but handle heavier loads, which matters if the box sits under a spot that gets driven over occasionally, such as a section near a driveway apron. For most lawn and garden placements, a UV-treated HDPE box is enough, and it is the material used in nearly every box sold by the major irrigation brands.
Look for these features when comparing products:
- UV inhibitor treatment noted on the packaging or product page
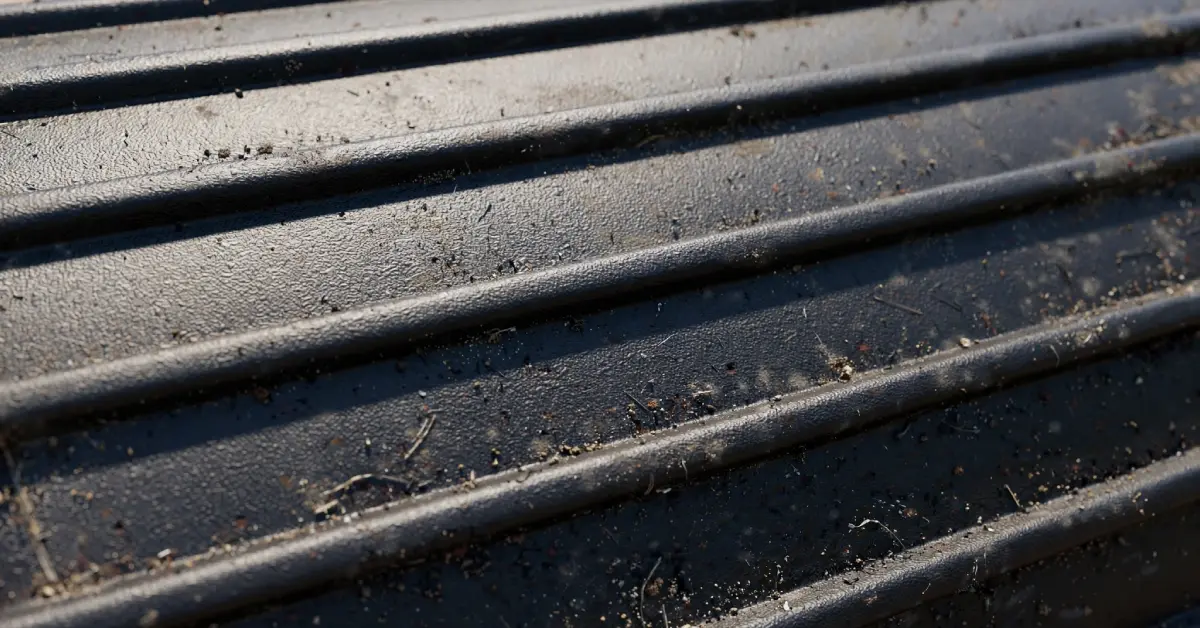
- Reinforcing ribs moulded into the side walls for load resistance
- A knockout or pre-cut pipe hole sized for your pipe diameter
- A lid that locks or bolts down if the box sits in a high-traffic area
- A brass or stainless bolt option instead of plain plastic, which corrodes faster
What Does an Irrigation Valve Box Cost
Pricing scales with size and features rather than brand alone. A basic 6 to 10 inch round box typically runs between 6 and 35 dollars, depending on whether it includes a lock or a heavy-duty rated lid. Standard rectangular boxes built for two or three valves fall in the 40 to 65 dollar range. Jumbo and maxi boxes, sized for manifolds with several valves or a backflow assembly, can run from around 95 dollars up to several hundred for the largest locking commercial models.
A few add-ons affect the final price:
- Locking lids add roughly 10 to 30 dollars over a standard drop-in lid
- Extension collars for deep installations typically cost 65 to 80 dollars
- Purple reclaimed-water boxes are priced close to their green equivalents
- Body-only options, useful if you already have a spare lid, cost less than a full box and lid set
For most single-family homes, a standard rectangular box with a drop-in lid covers the job without the extra cost of locking hardware or an extension.
Installing an Irrigation Valve Box Step by Step
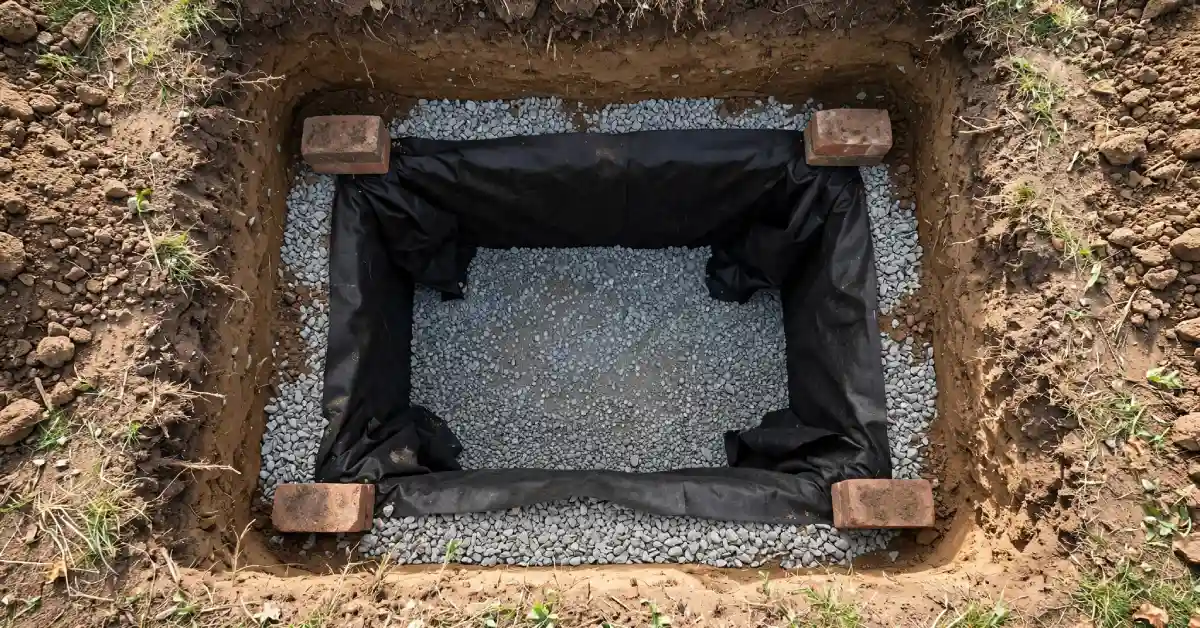
- Dig the hole. Excavate a space slightly wider and deeper than the box itself, leaving room for a gravel base and clearance around the valve assembly.
- Add a drainage layer. Place a few inches of coarse gravel or crushed stone at the bottom, then lay a piece of geotextile fabric over it. This keeps the box from sitting in standing water and stops soil from working up into the gravel over time.
- Set a support base. Rest the box on bricks, pavers, or treated lumber blocks around its perimeter so no weight transfers onto the pipes or valve body underneath.
- Position the box over the valve. Lower the box so the valve sits centred inside it, with the pipe hole aligned to where the line enters and exits.
- Check the height. The lid should sit flush with, or very slightly above, the finished grade. Adjust the base material until this lines up before backfilling.
- Backfill around the box. Compact soil in layers around the outside walls, taking care not to crush or shift the box out of position.
- Mark the location. Note the spot on a system map or with a small flag until the grass fills in, so you are not searching for it later.
Mistakes That Shorten a Valve Box Lifespan
A few installation habits cause more repeat repairs than any single product defect. Setting the box directly on packed clay soil, with no gravel base, traps water against the box bottom and speeds up corrosion on any metal fittings inside. Burying the lid below grade is another common issue. It looks tidy at first, but it forces you to dig every time you need access, and soil creep over the lid makes it harder to find each season.
Overfilling the box with excess wire or coiled pipe is a third mistake. Cramped wiring is more likely to chafe against the box walls or valve body, which can wear through insulation and cause a short. Leave enough slack to work comfortably, but keep the interior reasonably clear.
Seasonal Care and Winter Prep
A valve box makes seasonal maintenance far simpler, provided it stays accessible. Before the first hard freeze in colder regions, open each box and check that drain valves or blow-out points are reachable without digging. Clear any soil, mulch, or grass clippings that have built up around the lid edges over the growing season.
In spring, check for cracked lids or bolts loosened by frost heave before running the system for the first time. A quick visual check at each box, alongside testing each zone, catches most seasonal issues before they turn into a bigger repair. If your yard also includes a garden pond fed separately from the irrigation lines, our pond care guide walks through the seasonal checks that keep a water feature healthy year-round.
Garden beds near a valve box benefit from the same seasonal rhythm. If you grow flowers you plan to cut and dry rather than display fresh, our guide on how to preserve flowers is worth a look once your beds are in full bloom.
FAQs
How deep should an irrigation valve box be buried?
Deep enough that the lid sits flush with, or just above, finished grade, while the valve and fittings below have a few inches of gravel clearance beneath them. Exact depth depends on your valve height and pipe run.
Can I use one valve box for multiple valves?
Yes, as long as the box is sized for the number of valves and gives you enough room to reach each one with a wrench. Rectangular and jumbo boxes are built for this.
What is the difference between a green lid and a purple lid valve box?
Green is the standard colour for potable irrigation water. Purple marks a reclaimed or non-potable water line, a colour code used industry-wide so anyone working on the system knows the water source.
How often should I inspect my valve box?
Twice a year is a reasonable baseline, once in spring before the system starts and once in fall before winterising. Inspect sooner if a zone stops responding correctly.
Do I need a locking lid?
Only if the box sits somewhere with foot traffic, curious pets, or public access. A standard drop-in lid is enough for most private backyard placements.