

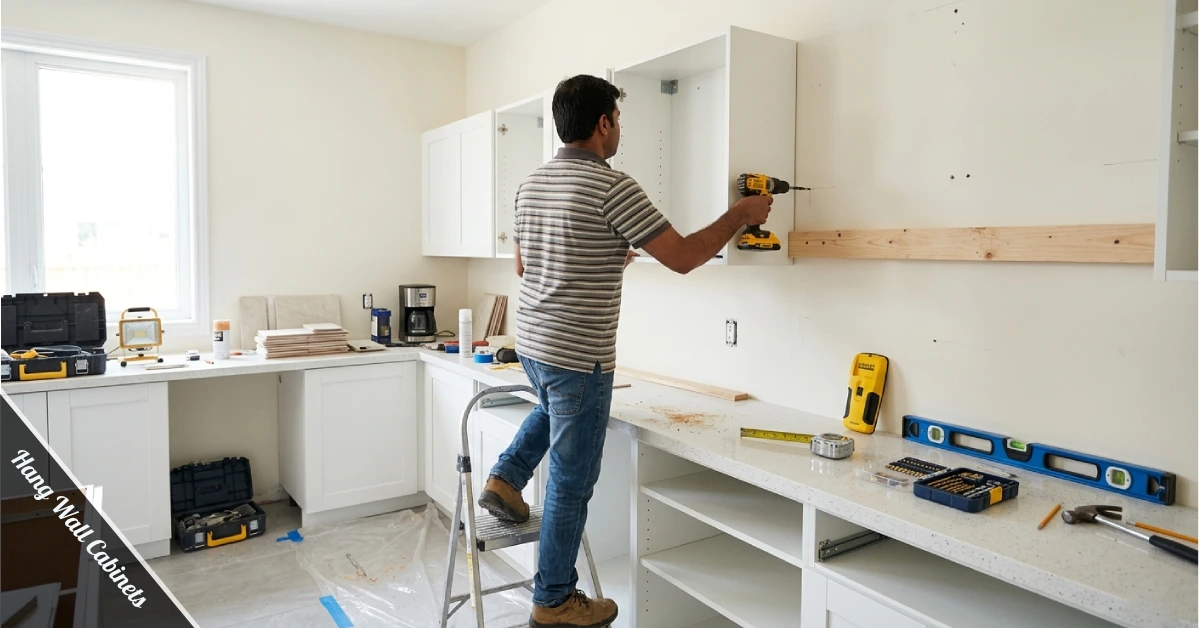
To hang wall cabinets, locate your wall studs, mark a level line at 54 inches from the floor, screw a temporary ledger board along that line for support, then lift each cabinet onto the ledger and drive 2.5- to 3-inch screws through the cabinet back into the studs. Start at a corner and work outward. Always keep cabinets level and plumb as you go.
Most people assume hanging wall cabinets is a two-person job requiring a contractor. In most cases, it is not. With the right tools, a clear plan, and the steps below, you can install wall cabinets yourself in a weekend. This guide covers everything: what tools you need, how to prep your wall, how to mount each cabinet securely, and the mistakes that cause cabinets to fall.
Tools and Materials You Need Before Starting
Getting organised before you lift a single cabinet saves you trips up and down the ladder. Wall cabinets are heavy, so everything should be within reach.
Tools:
- Stud finder
- Cordless drill and bits
- Laser level or bubble level (at least 48 inches long)
- Tape measure
- Pencil or chalk line
- Clamps (at least two)
- Step ladder
- Hammer or mallet
- Utility knife
Materials:
- 2.5- to 3-inch washer-head cabinet screws (coarse-threaded, No. 10)
- Wood shims
- 1×4 ledger board
- Filler strips (if needed)
- Cabinet hardware (hinges, handles)
Skip drywall anchors for the main mount points. Drywall anchors, molly bolts, and other inserts should be avoided when hanging cabinets. Studs are your only reliable anchor for anything this heavy.
How to Prep Your Wall Before You Hang Wall Cabinets
Preparation is where most DIY cabinet installs go wrong. Rushing this step causes crooked cabinets, stripped screws, or worse.
Find the studs. Use a stud finder and run it along the wall in a slow, steady line. Mark each stud edge with painter’s tape. Wall studs are typically spaced 16 inches on centre, but this can vary depending on the construction of your space.
Find the floor’s high point. Place your level on the floor and slide it across the area where the cabinets will hang. The highest point sets your baseline. Mark it clearly.
Mark your 54-inch line. Measure up from that highest point 54 inches and use your level to draw a straight horizontal line across the entire wall. This is where the bottom of your wall cabinets will sit. The standard height keeps them 18 inches above a 36-inch countertop.
Map out the cabinet layout. Draw vertical lines on the wall to mark the edges of each cabinet. Label which cabinet goes where. This prevents confusion once you start lifting.
Install a Ledger Board First
A ledger board is a straight 1×4 piece of lumber that you screw horizontally to the wall along your 54-inch line. Its job is to hold the weight of each cabinet while you drive the mounting screws in.
Attach a straight 1-inch-by-4-inch ledger on the wall at the 54-inch line and use a level to ensure your cabinets are installed accurately.
Drive the ledger screws into studs, not just drywall. At least two screws, going into two separate studs, is a safe minimum. The ledger comes down at the end; it is only temporary.
If your cabinets come pre-assembled with doors attached, remove the doors now. They add weight and block your drill access. Set them aside and label them so rehanging is simple.
How Do You Hang Wall Cabinets: The Full Step-by-Step Process
Step 1: Start at the Corner
Always begin at a corner or at the far left of the run if there is no corner unit. Corner cabinets anchor the entire layout. Getting this one level and plumb means every cabinet that follows will line up correctly.
Set the first cabinet onto the ledger board. Do not let go. Have a helper hold it or use a bar clamp to hold it against the wall temporarily.
Step 2: Drill the Mounting Holes
Before lifting the cabinet, mark where your stud lines cross the cabinet back. Drill pilot holes through the back panel at the top rail and the bottom rail, centred on the stud locations.
Drill holes through the cabinet backs at the top, middle, and bottom rails; your top and bottom holes should be about 3/4 inch from the cabinet’s edge.
Step 3: Drive the Mounting Screws
With the cabinet resting on the ledger, align the pilot holes with the studs. Drive a 3-inch cabinet screw through the top rail first, just enough to grip the wall. Check that the cabinet is level and plumb. Adjust with shims behind the cabinet if the wall is not flat. Then drive the remaining screws.
The typical overhead cabinet is installed with 3-inch, No. 10, coarse-threaded screws, with a weight capacity of 75 pounds each. Upper cabinets should have a minimum of at least four screws, each penetrating into separate studs.
Do not overtighten. Snug is enough. Overtightening can pull the cabinet back panel or strip the stud.
Step 4: Connect Cabinets
Once the first cabinet is secure, set the second one on the ledger right beside it. Clamp the face frames together so they are flush at the front. Drill through one face frame into the other and drive 1.25-inch wood screws to join them. Then mount the second cabinet to the wall using the same process.
Work your way across the wall, one cabinet at a time, always checking the level before you fully tighten any screw.
Step 5: Shim for a Flat Line
Walls are rarely perfectly flat. When you find a gap between the cabinet back and the wall, slide wood shims into the gap before tightening the screws all the way. This keeps the face frames flush and prevents the cabinet from racking or tilting. Score the shim flush with a utility knife once the screws are tight.
Step 6: Remove the Ledger and Rehang Doors
Once all cabinets are mounted and joined together, remove the ledger board. Fill the screw holes with putty and touch up with paint. Rehang the cabinet doors, adjust the hinges so the doors sit flush, and install your hardware.
Weight Limits: What Your Wall Cabinets Can Actually Hold
Understanding load capacity prevents failures after installation.
Most wall cabinets can hold between 30 and 50 pounds per linear foot if properly installed. A 36-inch wide cabinet, properly mounted into studs, can safely hold 90 to 150 pounds of contents.
The installation quality significantly affects weight support; improper mounting can lead to failure even with the strongest materials. Screws that are at least 2.5 to 3 inches long penetrate deeply into studs, offering a strong and secure attachment.
If you have no choice but to mount somewhere without a stud behind it, use toggle bolts rather than standard drywall anchors. Some anchors can support 50 or more pounds, but the overall system, cabinet plus contents, must be carefully assessed. For heavy loads, stud mounting is always the better path.
Common Mistakes That Cause Cabinets to Fall
Knowing what goes wrong helps you avoid it.
- Skipping the ledger board. Trying to hold a cabinet and drill at the same time causes crooked installs. The ledger solves this.
- Not checking plumb. A cabinet that leans forward or backward puts uneven stress on the screws.
- Using too few screws. Two screws into one stud is not enough for a loaded cabinet.
- Trusting the wall is flat. Most walls have low spots or bulges. Always shim.
- Overtightening screws. This strips the wood in the stud and reduces holding power over time.
What to Do When There Are No Studs Where You Need Them
This is more common than most guides admit. If your layout places a cabinet over a gap between studs, you have a few options.
You can add a piece of 3/4-inch plywood to the wall, screwed into the nearest studs on either side, and then mount the cabinet into the plywood. This spreads the load across a wider area.
Alternatively, use a French cleat system: two interlocking angled strips of wood, one on the wall and one on the cabinet back. A French cleat mounted across multiple studs can carry significant weight and makes repositioning cabinets simple later.
Some installers like to add Liquid Nails for even more holding power and install an under-cabinet block for added support when screws alone feel insufficient.
For more guidance on kitchen planning and layout, see our article on measuring and planning a kitchen cabinet layout.
FAQs
How high should wall cabinets be hung?
The standard bottom edge sits 54 inches from the floor, which places them 18 inches above a standard 36-inch countertop. This gives you enough clearance for countertop appliances and comfortable reach into the cabinet.
Can one person hang wall cabinets alone?
Yes, with a ledger board and bar clamps. The ledger holds the cabinet while you drill and drive screws. Without it, solo installs are very difficult because the cabinet slides or tips.
What screws should I use to hang wall cabinets?
Use 2.5- to 3-inch No. 10 coarse-thread washer-head cabinet screws. These bite into wood studs firmly, and the wide head distributes stress across the cabinet’s back rail.
Do wall cabinets need to hit a stud?
Yes, for anything load-bearing. Drywall alone cannot hold the combined weight of a cabinet and its contents over time. If you cannot hit a stud, add a plywood backer across the wall first.
Should I install upper cabinets before base cabinets?
Always. Base cabinets take up floor space and make it much harder to stand close to the wall when hanging uppers. Install all wall cabinets first, then the base cabinets below.