

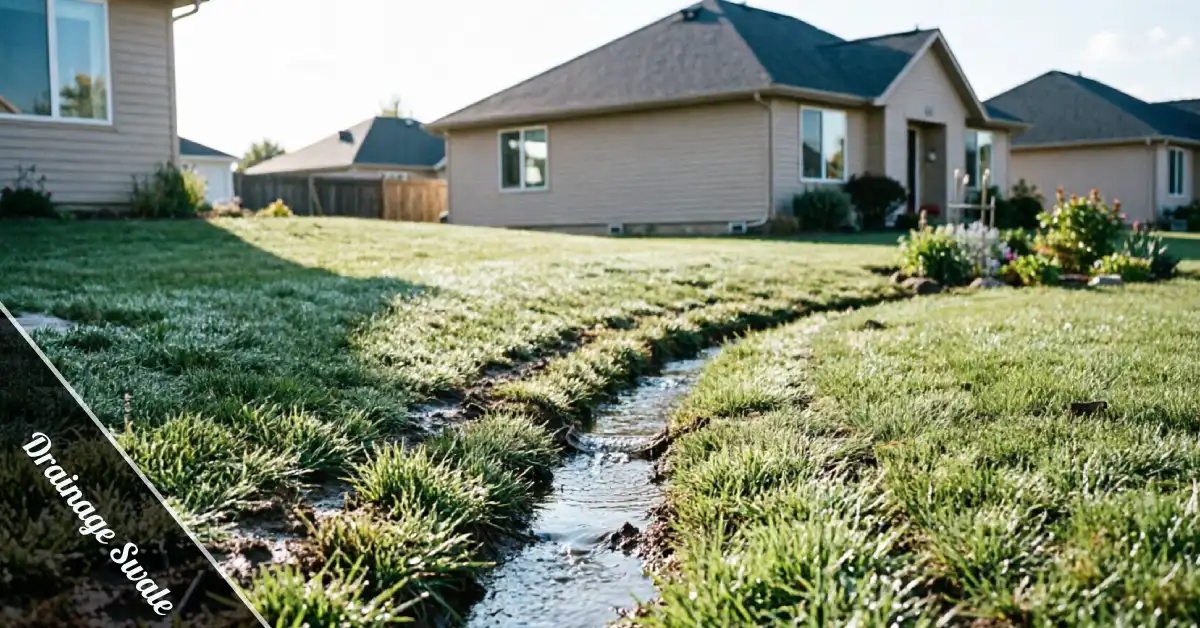
Standing water in your yard after every storm? That’s your lawn waving a white flag. A drainage swale is the quiet hero that can turn a swamp into solid ground, and if your dog’s paws are permanently muddy from the mess, artificial grass built for dogs paired with a swale is basically the dream team. Here’s everything you need to know, no jargon, no fluff, just the stuff that actually matters when your yard turns into a lake every spring.
What Is a Drainage Swale, Really?
Think of a swale as a shallow, gently sloped channel that guides rainwater away from your house instead of letting it pool. It’s not a ditch, and it’s not a buried pipe. It’s more like a lazy river for stormwater, moving water where you want it to go instead of wherever gravity feels like taking it that day.
Most homeowners never notice one until theirs stops working. A properly shaped channel blends right into the landscape, dipping just enough to carry water without looking like an obvious trench cutting through the yard.
How It Handles Rainwater
Water hits your roof, your driveway, and your lawn, and it has to go somewhere. A well-built swale catches that runoff and carries it toward a safe outlet, like a storm drain, a rain garden, or a low spot on the property line.
The slope does the heavy lifting here. No pumps, no electricity, just smart grading and gravity working the way they’re supposed to. That’s really the whole trick, and it’s why the fix has stuck around for centuries.
Signs Your Yard Actually Needs One
If puddles hang around for a day or two after rain, that’s already a red flag worth taking seriously. Soggy patches near your foundation are worse, since they hint at bigger structural headaches waiting down the road.
Erosion trenches cutting through your lawn mean water is already carving its own path. A drainage swale simply gives that water a better, more controlled route instead of letting it choose one for you.
Basements that smell musty after storms often trace back to this exact problem too. Redirecting surface water before it ever reaches the foundation solves a lot of downstream headaches at once.
Types Worth Knowing
Grass swales are the most common and the cheapest option, just a shaped dip planted with regular turf. They blend in easily and mow like any other part of the lawn once established.
Rock swales handle heavier flow and look tidy running along property lines or driveways. Bioswales go a step further, adding plants that filter runoff before it reaches storm drains, which your local watershed genuinely appreciates.
If you’re planting along the edges of one, a bare root tree is a smart budget move since it establishes fast in that slightly moist soil near the channel. Just keep the trunk clear of the actual flow path so roots don’t end up blocking things later.
Drainage Swale vs French Drain
A French drain sits underground, hidden in gravel and pipe. A drainage swale sits right on the surface where you can see it working. Swales cost less and need far less digging to install.
French drains earn their keep where space is tight, or the yard is nearly flat. Most properties actually do fine with a swale alone, though, and it’s a much easier weekend project for most homeowners.
Drainage Swale vs a Basic Ditch
A ditch is just a trench someone dug and forgot about. A proper swale is engineered, with a calculated slope, defined width, and often plant cover to slow erosion over time. Ditches flood and erode fast.
A swale, built right, stays stable for years without much fuss. That difference alone often justifies the small amount of extra planning it takes upfront before any dirt gets moved.
Design Basics That Actually Matter
Slope is everything here, full stop. Too flat and water just sits there; too steep and it erodes the channel within a season or two. Most pros aim for a gentle grade, around one to two percent.
Gradual side slopes matter too, so mowers and feet can still move through the area easily. Width and depth depend heavily on how much water your particular property sheds during a normal storm.
A small suburban lot might only need a shallow, two-foot-wide dip to handle things fine. Larger properties with more roof and pavement runoff need wider, deeper channels to keep pace during heavier storms.
Location matters just as much as sizing. Running the channel along a natural low point in the yard means less grading work overall, and it usually looks more like it belongs there instead of an obvious add-on. Keep a reasonable distance from the foundation itself, since you want water moving away from the house, not just relocated a few feet closer.
Installation and Cost
DIY grass versions can run a few hundred dollars if you’re handy with a shovel and a laser level. Rock or bioswale setups with professional grading and planting climb higher, often into the low thousands.
Length, material, and local labor rates all shift that number quite a bit. Getting a couple of quotes before committing is always worth the extra hour it takes to compare them properly.
Ask any contractor about drainage history on the lot too, since a company that’s worked nearby usually already knows the soil type and typical rainfall patterns for your area. That local knowledge often saves a redo down the line.
Before any digging starts, always call 811 to get utility lines marked first. It’s free, it’s fast, and it saves you from a genuinely expensive mistake down the line. Skipping this step is the single most common regret homeowners mention after installation day wraps up.
Maintenance and Common Mistakes
Clear debris and sediment out a couple of times a year so the channel keeps its intended shape. Watch closely for bare patches where grass has thinned, since exposed soil erodes fast during heavy rain.
The biggest mistake by far is grading the whole thing toward the house instead of away from it. Double-check your slope direction carefully before calling the project finished and packing up the tools.
That one detail is the difference between a dry basement and a very soggy, very expensive surprise a few months later. It genuinely pays to measure twice on this particular step.
For plantings that actually thrive in that consistently moist soil near the edge of a channel like this, something like a Biloxi blueberry bush does double duty nicely. It looks good and soaks up extra moisture at the same time, which is a small touch that makes the whole setup feel intentional rather than purely functional.
FAQs
Do I need a permit?
Usually not for a simple grass version on your own property, but check local rules if you’re tying into a storm drain or working near a property line.
Can I install one myself?
Yes, for smaller residential setups. A shovel, a level, and an afternoon are often enough, though bigger properties or tricky slopes are worth handing to a pro instead.
How long does it last?
With basic upkeep, a well-graded channel can last decades. The grass or plants might need refreshing every few years, but the underlying shape rarely needs redoing at all.
Will it attract mosquitoes?
Only if water sits for more than a day or two. Proper slope means standing water, and the bugs that love it generally aren’t an issue you have to worry about.
The Bottom Line
This kind of fix won’t win you any design awards, but it’ll quietly protect your yard, your foundation, and your weekends spent bailing out puddles after every storm. Get the slope right, keep it maintained, and a drainage swale will outlast most other backyard projects you’ve ever tackled.